Dragon Tower Defense Castle Town Normal Guide
Clear Castle Town’s 30 Normal waves by turning an affordable Assassin opening into Gold-funded Minigunner damage, then adding Bomb and a second Minigunner for the finish. If you have Rock, Lightning, Storm, Wind and Thorn, you can also clear all 30 waves without an income dragon.
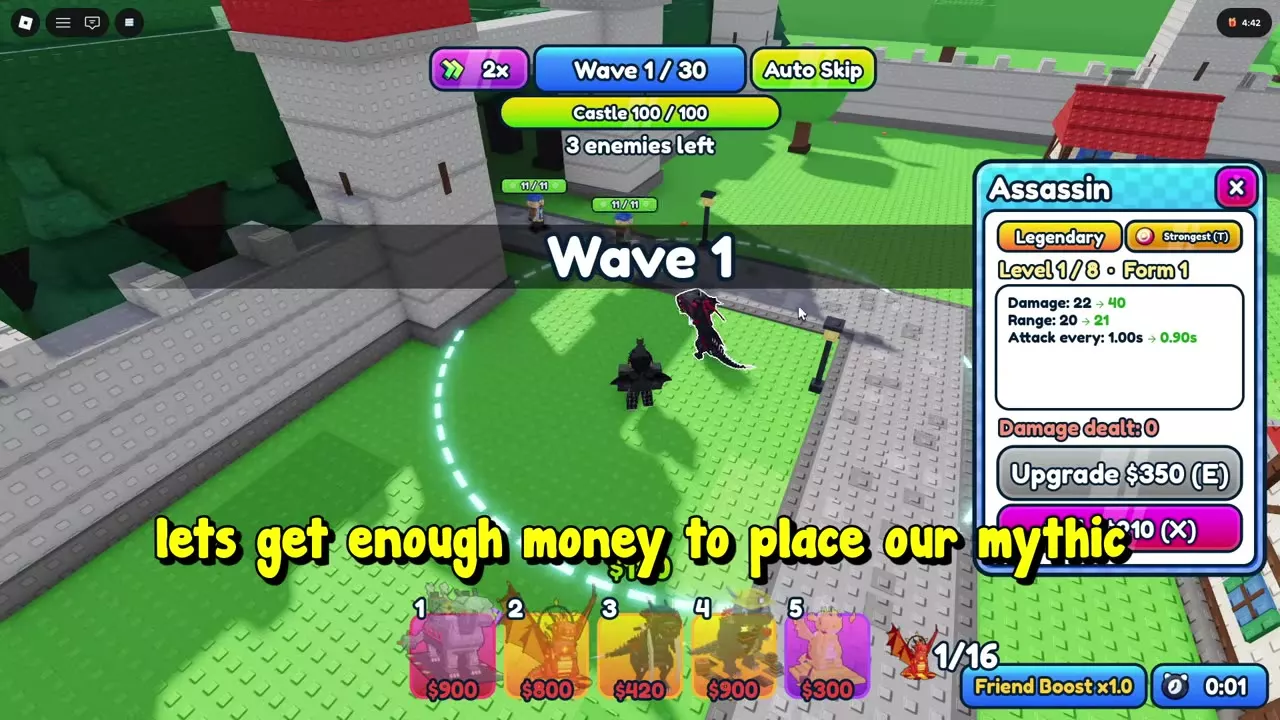
Open with a $420 Assassin on Strongest, then add Gold and a second Assassin. Place a $900 Minigunner left of the gate around wave 8 and develop it to Level 9 by wave 20. Add Bomb, reach Level 6 by wave 24, then place a second Minigunner on the right around wave 27. Bring it to Level 8 before wave 30. This route achieves a 100/100 castle-health clear and awards 300 base Coins. Without Gold, spend the $600 opening budget on Rock ($325) and Lightning ($275), then add Storm, Wind and Thorn. On either route, defeat King’s Champion on wave 30 and clear the knights still on the road.
Assassin, Gold and Minigunner Clear Route
Use Assassin to hold the opening, Gold to fund upgrades, Minigunner as the main damage dealer, and Bomb to add mines along the road. Develop the first Minigunner before buying the second so your income produces a strong damage core rather than several underleveled attackers.
The solo route clears 30 waves with Castle 100/100 under a 16-unit deployment limit. Its main checkpoints are:
| Wave | Goal |
|---|---|
| Opening | Assassin, then Gold |
| 8 | First Minigunner |
| 11 | Minigunner Level 3 |
| 12 | One Gold at Level 6 |
| 20 | First Minigunner Level 9 |
| 24 | Bomb Level 6 |
| 27 | Second Minigunner |
| 28 | Second Minigunner Level 7 |
| 30 | Second Minigunner Level 8 |
Prepare the Team and Opening Budget
Equip Assassin, Gold, Minigunner and Bomb before joining Castle Town’s Normal entrance in the lobby. The five-slot progression loadout adds Fire for splash and burn; the clear route below centers on the other four dragons.
| Dragon | Placement | Role |
|---|---|---|
| Assassin | $420 | Opening defense |
| Gold | $300 | Cash each wave |
| Minigunner | $900 | Rapid damage |
| Bomb | $900 | Path mines |
| Fire | $800 | Splash and burn |
All dollar amounts in this walkthrough are battle Cash. Coins are the currency awarded after victory.
Place Assassin during preparation, then press START when ready. Save toward the next deployment rather than trying to place the entire equipped team at once.
Rock and Thorn opening
For a separate early-team opening with $600, place a $325 Rock beside the entrance road and a $250 Thorn opposite it. The pair costs $575, leaving $25. Rock offers broad opening coverage, but this setup needs reinforcements as enemies move beyond the initial firing area. Follow the coverage fixes below when using this team.
Establish Defense and Gold Income
- Place the $420 Assassin beside the entrance road so passing enemies enter its range. Set its target priority to Strongest.
- Once the opening defense holds, add Gold for $300 each and a second Assassin. Keep enough damage on the road while building toward three Gold units.
- Upgrade Gold as the defense allows, then spend its recurring income on Minigunner’s deployment and growth.
With three Gold units deployed, one reaches Level 6 by wave 12, producing $400 each wave. That payout belongs to the max-level Gold; it is not the starting income of every Gold on the field.
Gold’s panel labels recurring income Cash every wave and cumulative production Cash made. Use the recurring payout when deciding how much an upgrade will contribute to the remaining waves.
Develop Minigunner and Add Mines
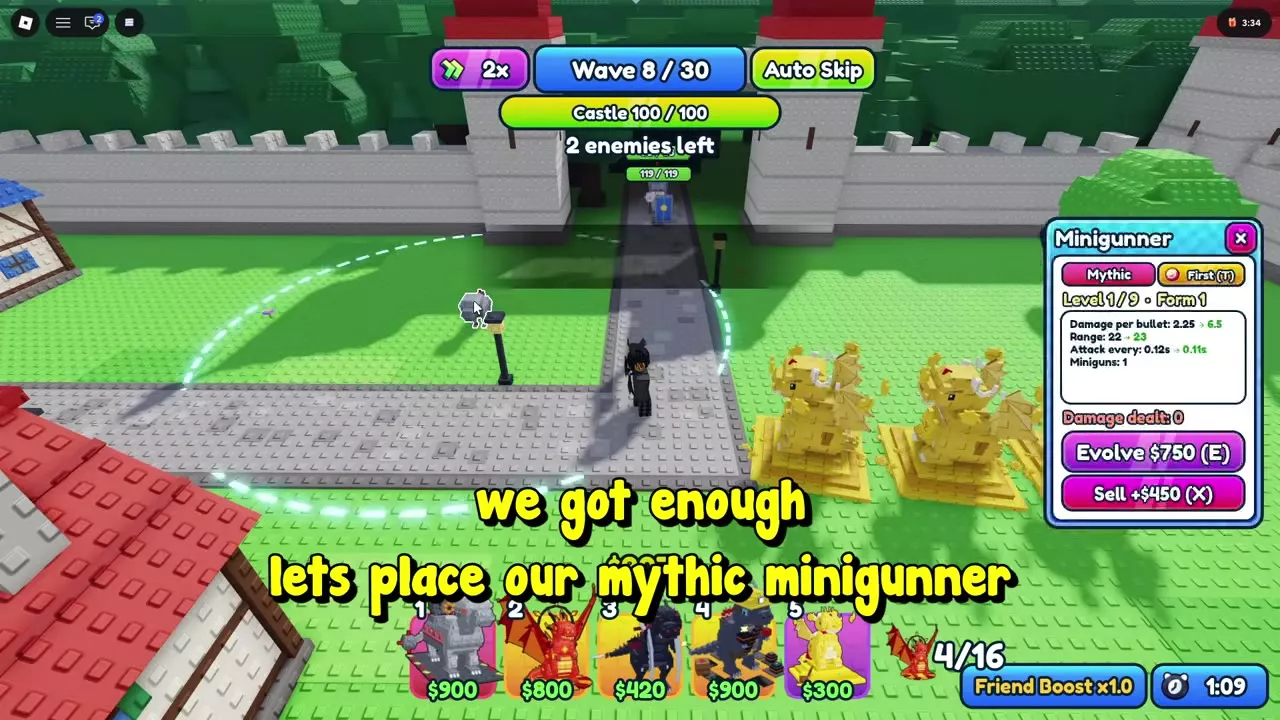
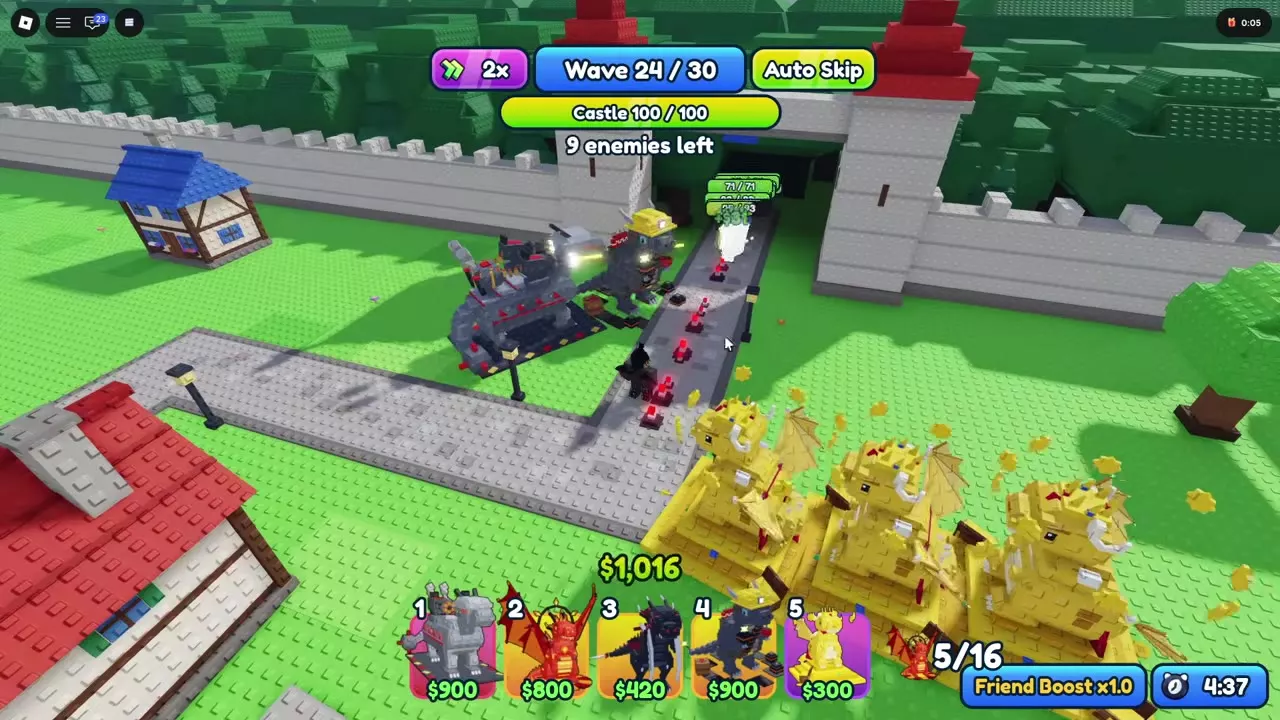
- Around wave 8, place a $900 Minigunner on the grass left of the enemy gate, facing the gate. Position its range over the entrance road and the nearby turn.
- Bring it to at least Level 3 by wave 11. Select it and use the Upgrade/Evolve button or E to continue its growth.
- Keep investing in this first Minigunner until it reaches Level 9 by wave 20.
- Add Bomb for $900 near the entrance road and develop it to Level 6 by wave 24. Its mines add damage along the path alongside Minigunner’s gunfire.
Budget for the second minigun
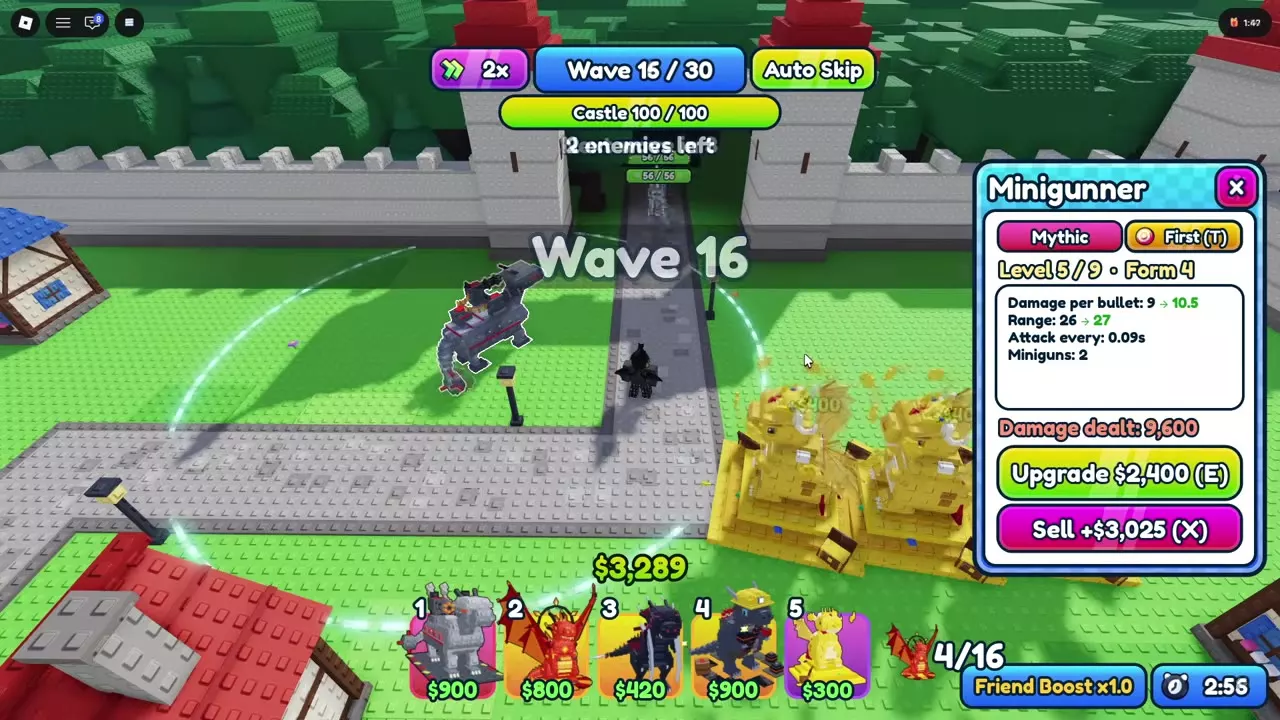
The evolution from Minigunner Level 4 to Level 5 costs $1,900 and raises its minigun count from one to two. This is a useful investment milestone: damage per bullet changes from 10 to 9, but the unit gains a second gun and its attack interval improves from 0.10 to 0.09 seconds. Judge the evolution by the whole attack change, rather than the bullet-damage number alone.
Build Bomb’s path coverage
At Level 6, Form 4, Bomb deals 110 damage per mine, places mines every 2.25 seconds, and supports up to 19 mines. Its mines have a blast radius of 6, and its cluster bombs deal 19 damage each across three bombs, with a radius of 4. Place it where its range reaches the road so that this investment contributes to the same entrance defense.
Add the Second Minigunner and Finish Wave 30
- Around wave 27, place a second $900 Minigunner on the right side of the gate, facing the entrance.
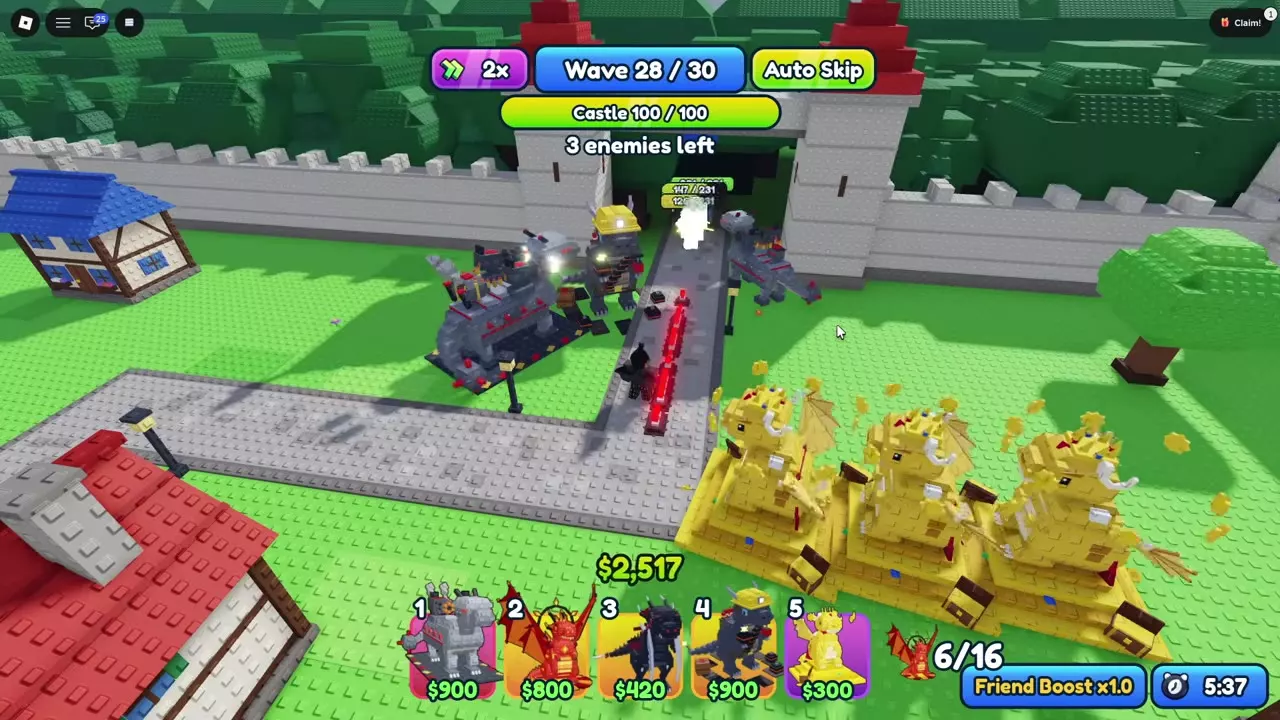
- Upgrade it to Level 7 by wave 28, then Level 8 before the final wave. Together, the two Minigunners cover the entrance from opposite sides while Bomb’s mines occupy the road.
- Keep both Minigunners firing and Bomb’s mines on the road during wave 30. King’s Champion summons knights as it advances. After it falls, keep the road covered until the last enemy is down.
The second Minigunner’s Level 8-to-9 upgrade costs $4,700. Budget for that separately from its $900 placement cost. The full-health clear finishes with this second unit still at Level 8, so its final upgrade is not required to match that result.
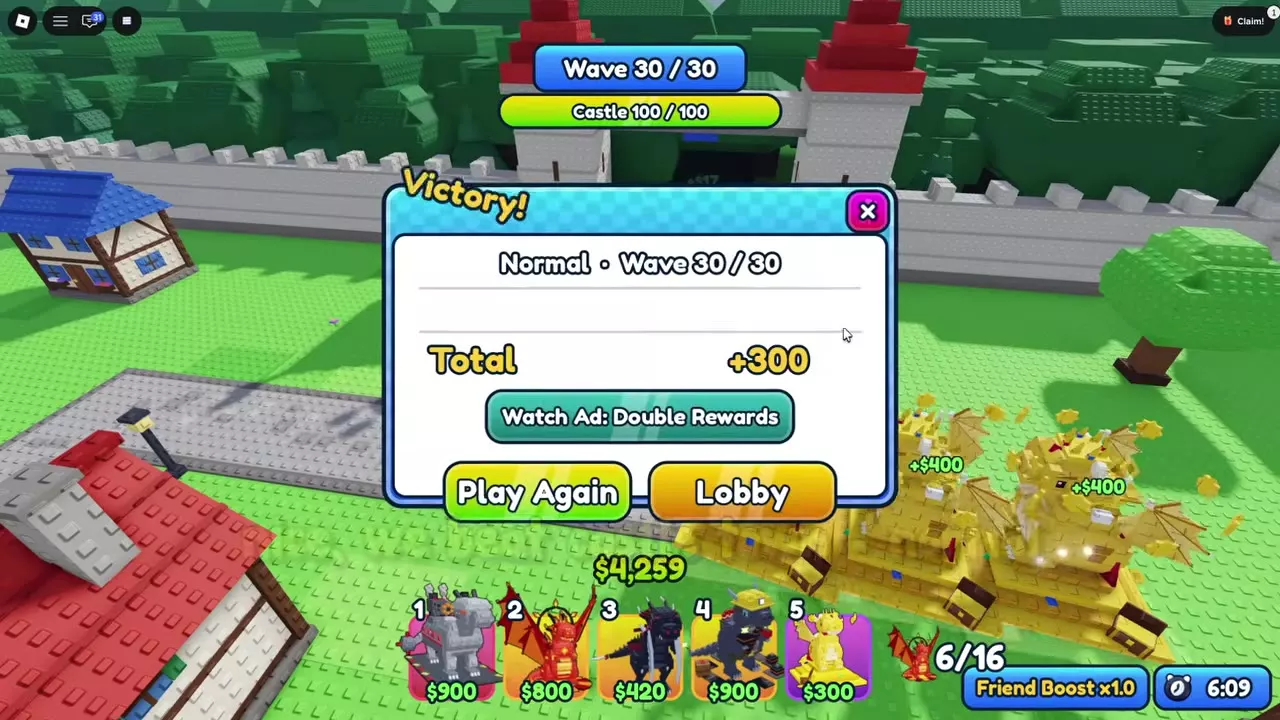
Completing Normal awards 300 base Coins. The entrance also lists a 5% Trait Crate chance. The victory screen offers Watch Ad: Double Rewards, Play Again, and Lobby.
Clear Normal without an Income Dragon
Equip Rock, Lightning, Storm, Wind and Thorn for solo Castle Town Normal. Spend the starting Cash on two attackers, then use wave earnings to build up the defense at the gate.
- Waves 1–2. Place Rock beside the entrance road for $325, then place Lightning for $275 during wave 1. Together they use the full $600. At the end of wave 2, place a second Rock across the road for $325 so both sides cover enemies leaving the gate.
- Waves 3–9. Place Storm for $500 on the grass in wave 3 so its chain attack reaches groups coming through the gate. After wave 4, spend $550 to evolve it to Level 2. Place Wind for $375 in wave 6 and aim it along the road for its later line attack. Put the next $800 into Storm for Level 3 in wave 7, then bring it to Level 4 in wave 9.
- Waves 11–15. Upgrade one Rock to Level 4 by the start of wave 12. Add another Lightning near the end of wave 12 and bring one Lightning to its maximum, Level 4, by the end of wave 13. Its last upgrade costs $700. In wave 14, upgrade Wind to Level 4 to hit enemies in a line. Keep that stretch of road covered for the first Black Knight (1,000 HP) on wave 15.
- Waves 16–20. Place Thorn for $250 around wave 16 and raise it to Level 4 for multi-target damage. Add another Storm near the entrance in wave 18 and bring it to Level 4 in wave 19. The wave 20 Black Knight has 1,500 HP. Keep attacking the ordinary enemies still on the road after its health bar disappears.
- Waves 21–29. Add Storms as Cash allows and develop one to Level 5 before the 2,000-HP Black Knight on wave 25. Continue upgrading the Storms near the gate through wave 28. Around the end of wave 29, bring another Lightning to Level 4 and Wind to Level 5.
- Wave 30. Keep Wind aimed down the road and Storm’s chain attacks in range of the knights that King’s Champion (2,400 HP) summons. If you need more coverage during the fight, place another Rock and upgrade it to Level 3 as Cash allows. Defeat the Champion, then finish every remaining enemy to clear Normal.
Early-Team Coverage Problems
With the Rock-and-Thorn opening, enemies can leave both units’ range during wave 2. An upgrade at the entrance does not solve a gap farther along the road. Evolving Rock while leaving only $51 also prevents an immediate $150 Cloud reinforcement. Reserve enough Cash for another firing position when enemies are escaping the first one.
Reinforce the mixed team
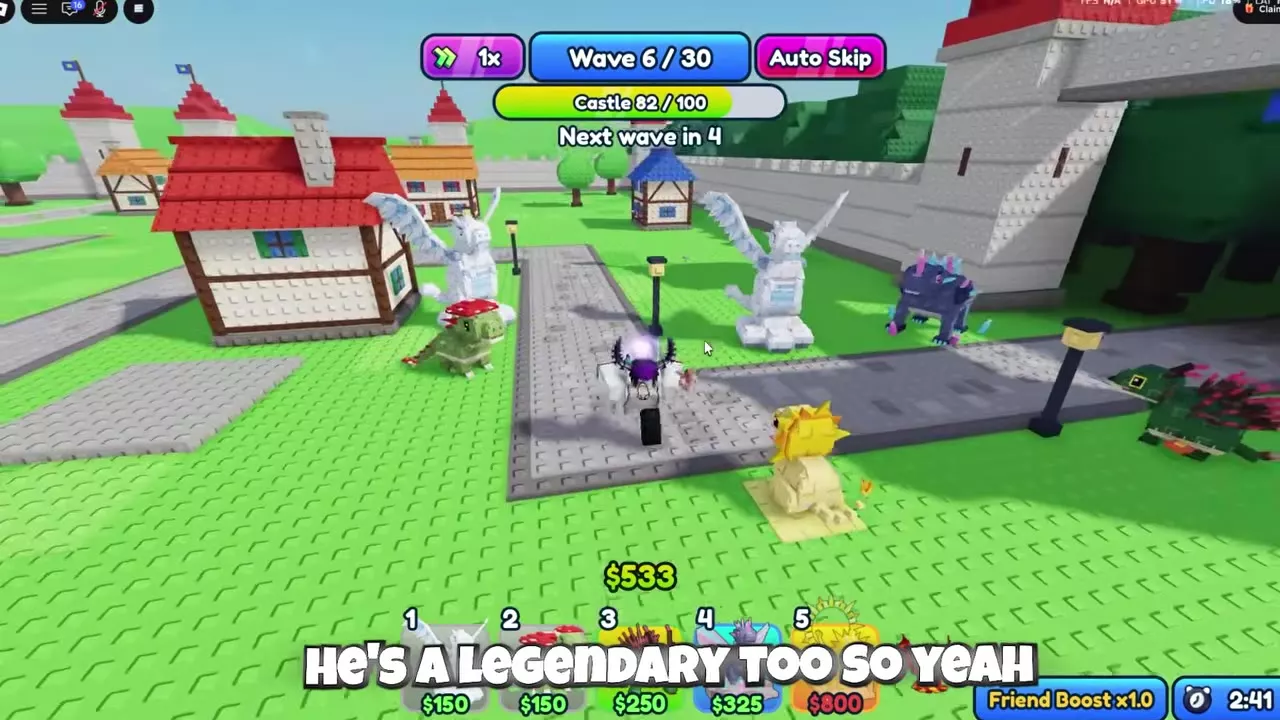
- During wave 3, add a $150 Cloud, then a $150 Mushroom. Evolve the existing Cloud for $150.
- During wave 4, add another Cloud across the road and evolve it. Use the extra positions to keep attacking enemies after they pass the original pair.
- Save for Sun’s $800 placement and deploy it beside the entrance chokepoint around wave 6. Its Level 1 range is 10.5, so keep it close enough to reach passing enemies.
- Evolve Sun for $750. Before wave 9, spend $425 to bring Thorn to Level 3, then evolve Mushroom for $150 during wave 9.
- Before wave 10, add another $325 Rock near the entrance to increase damage where the team’s coverage overlaps.
This reinforced opening holds through wave 12 with 82/100 castle health, after earlier leaks. Use it to stabilize an early team; follow the Assassin–Gold–Minigunner route above for the complete 30-wave clear.
When enemies keep escaping the entrance, build a firing position farther along their route. The placement and route coverage guide explains how to extend useful coverage with different attack shapes.
Hard Difficulty and Income Choices
- Continue with the Pirate Cove Hard walkthrough for its 40-wave route and rear-defense decisions.
- Compare Gold and Gumball when choosing between lower deployment cost and higher income per deployment slot, or deciding whether an upgrade has enough waves left to repay its cost.
- Open the Dragon Directory for individual dragon growth, acquisition and upgrade details.