Dragon Tower Defense Team Builds
Build a team whose opening attacker, economy and later damage work together. Choose a lineup that fits your dragons and starting Cash, then develop its strongest roles in the right order.
For early Easy runs, combine Cloud's reach with Thorn's three-target attacks and Mushroom's two-target attacks. A full progression loadout is Minigunner, Fire, Assassin, Bomb and Gold: open with Assassin, establish Gold income, then develop Minigunner. For advanced play, use Void, Gumball, Titan, Assassin and Sugar Rush; fund the main attackers before adding more units, and keep them inside Sugar Rush's boost circle.
Build Around an Affordable Opener
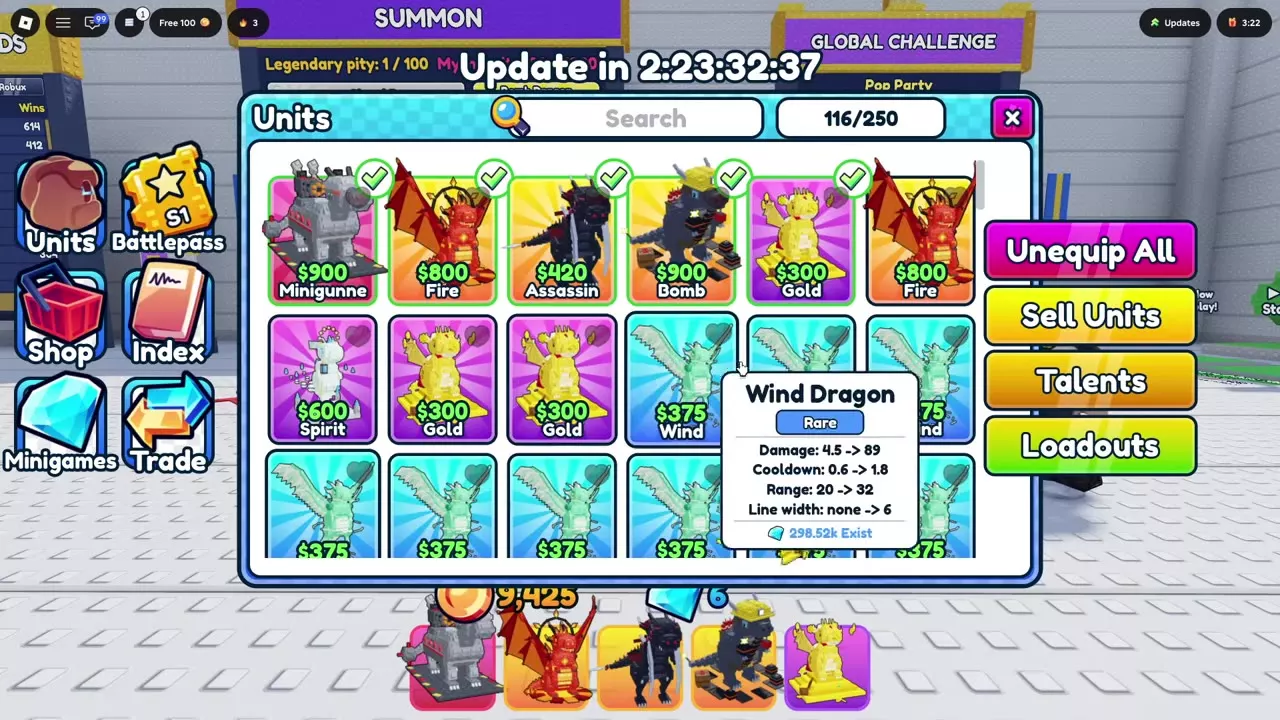
Your five equipped slots determine which dragons you can deploy. The battlefield deployment limit counts individual placed dragons, including additional copies of the same equipped dragon. For example, Castle Town allows 16 deployed dragons from your five-slot team.
Choose the lineup for your current stage:
- Early Easy: Cloud, Thorn and Mushroom provide reach and attacks against separate enemies.
- Progression: Minigunner, Fire, Assassin, Bomb and Gold combine an affordable opener, rapid damage, burn, mines and income.
- Advanced: Void, Gumball, Titan, Assassin and Sugar Rush combine multi-target beams, economy, splash damage and buffs.
Follow this investment order:
- Place an attacker you can afford with the map's starting Cash, where it covers the enemy route.
- If your team includes Gold or Gumball, deploy it once the opening defense holds.
- Spend your next Cash on your main damage dealer's upgrades and necessary coverage farther along the route.
- Add support when it can boost developed attackers.
Equip the chosen dragons before entering the map. The Units and loadouts guide covers team management; use damage, income and control choices when deciding which individual dragon fills a missing role.
Early and Progression Teams
Early Easy team
| Dragon | Placement | Role |
|---|---|---|
| Cloud | 150 Cash | Longer reach |
| Thorn | 250 Cash | Three separate targets |
| Mushroom | 150 Cash | Two separate targets |
Cloud extends coverage along the road. Thorn fires three thorns at different enemies, while Mushroom sends two spores at separate targets. Their multi-target attacks help handle groups; they do not concentrate every projectile on one enemy.
Develop these attackers while adding coverage near the entrance and farther along the route. Reinforce where enemies escape the first attack area instead of placing every dragon in the same spot.
Two Shadows for repeat Easy clears
For solo Sunny Meadow Easy, start with 600 Cash and place a Strength I Shadow beside the road. Upgrade it to Level 5 by wave 6, then place a second Strength I Shadow across the road on wave 8. Bring both to Level 6 before adding a Speed III Minigunner near the entrance for extra damage. This setup cleared all 20 waves. Select Play Again to repeat the run.
Full progression loadout
Equip Minigunner, Fire, Assassin, Bomb and Gold.
| Dragon | Placement | Team role |
|---|---|---|
| Assassin | 420 Cash | Opening defense |
| Gold | 300 Cash | Cash every wave |
| Minigunner | 900 Cash | Rapid damage |
| Fire | 800 Cash | Splash and burn |
| Bomb | 900 Cash | Path mines |
Assassin gets the defense running while you save for the more expensive roles. Gold finances later deployment and upgrades. Minigunner becomes the main rapid attacker, gaining a second minigun at Level 5. Fire adds splash and burning damage, while Bomb lays mines along the path and develops cluster bombs later.
For Castle Town, open with Assassin, add Gold and enough supporting defense, then deploy and upgrade Minigunner. Add Bomb as the economy grows. Develop the first Minigunner before funding the second one for the final encounter; carrying all five dragons does not mean placing all five immediately.
Castle Town without an income dragon
Equip Rock, Lightning, Storm, Wind and Thorn for solo Castle Town Normal. Rock (325 Cash) and Lightning (275 Cash) use the full 600-Cash opening budget. Add a second Rock across the road, then develop Storm for chain attacks and Wind for its Level 4 line attack. Thorn adds three-target coverage later. This five-dragon team cleared all 30 waves.
Advanced Damage and Support
Use Void, Gumball, Titan, Assassin and Sugar Rush for a developed lineup with several damage patterns and a dedicated support slot.
| Dragon | Placement | Team role |
|---|---|---|
| Void | 800 Cash | Multi-target beams |
| Gumball | 600 Cash | Cash every wave |
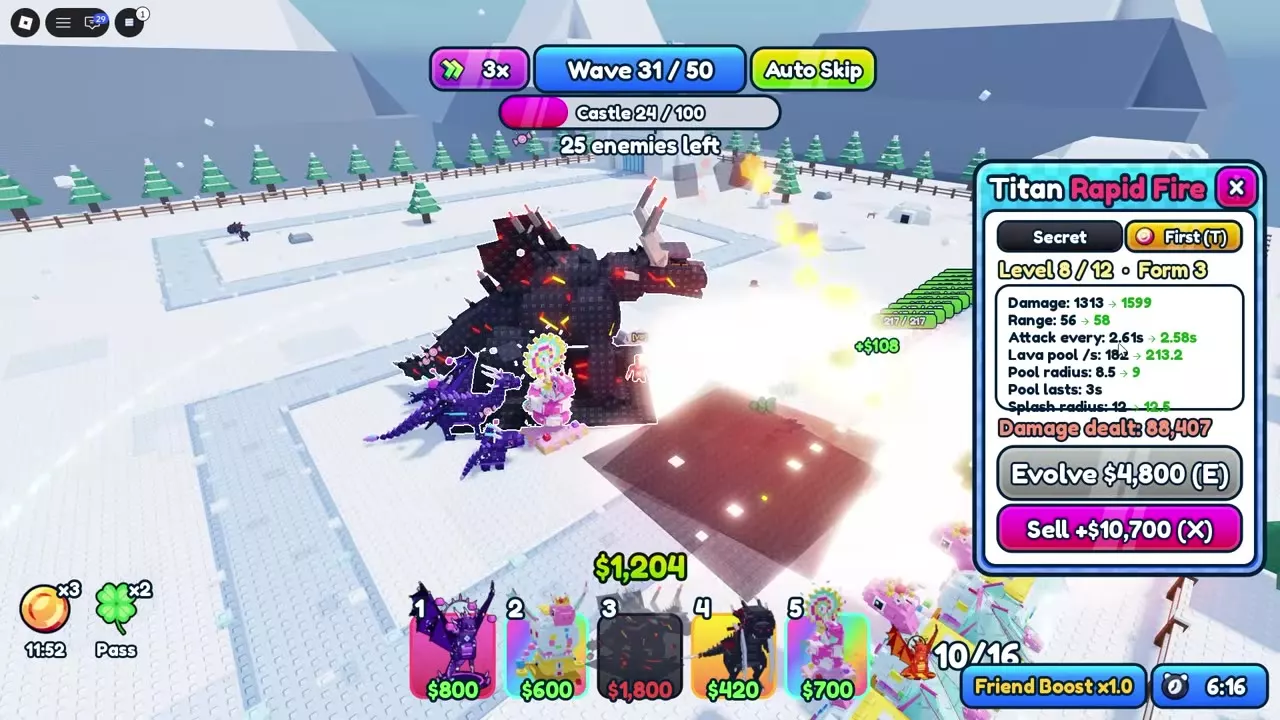
| Titan | 1,800 Cash | Splash and lava pools |
| Assassin | 420 Cash | Additional defense |
| Sugar Rush | 700 Cash | Nearby attacker buffs |
With Snowy Summit's 1,000-Cash opening, deploy Void first and add Assassin as funds arrive. Establish Gumball income after the opening holds, then fund Titan and its upgrades. Titan's 1,800-Cash placement cost makes it a later investment in this opening.
Void's beams attack different enemies simultaneously. Titan complements that spread with splash attacks and damaging lava pools on the route. Upgrade the established damage core before filling the field with more low-level attackers.
When Sugar Rush earns its slot
Replace an additional attacker with Sugar Rush when its boost circle can cover your developed damage dealers. At Level 6, Sugar Rush provides +30% damage, +25% attack speed and +3 range, with a boost circle of 18. Select it to inspect the coverage circle and look for candy markers on affected attackers.
Place Sugar Rush close enough to support the main damage cluster. Its value comes from improving attackers that already carry the defense, so establish and develop those attackers before committing heavily to support.
Gumball costs more to place than Gold, but its maximum payout is 1,000 Cash per wave per unit, compared with Gold's 400. Choose Gold when the lower 300-Cash entry cost better fits your opening; choose Gumball when you can support the larger investment and want more income per deployed unit.
Nightmare, Endless and Co-op Options
Nightmare teams
Minigunner, Void, Titan, Gumball and Sugar Rush provide an opening attacker, economy, two complementary damage patterns and support. Open with Minigunner, establish Gumball income, then develop Titan and buff coverage. A 60-wave clear at 100/100 castle health uses Minigunner Speed III, Void Range II and Titan Rapid Fire.
Another 100/100 clear uses a Void Berserker core with Gold, Assassin and Minigunner. Gold supplies the economy for Void's growth and has a four-unit placement limit. Choose between these routes according to the attackers, traits and income dragons you can support.
As nodt recommends Void, Moon, Dragoness, Assassin and Sun for Nightmare. That lineup combines multi-target beams, long-range damage, recurring helpers and Sun's nearby area damage followed by evolved line attacks. A separate community recommendation favors Sun, Moon and an income dragon, using economy to finance the two attackers while preserving opening defense.
For a Legendary core, use Sun, Assassin, Moon and Dragoness. Prioritize Sun, Moon and Dragoness over heavy early Assassin investment. The Legendary clear uses a castle revive. Follow the Legendary Nightmare route for its development and final-wave recovery.
Endless roles and replacements
After beating Snowy Summit on Insane, a balanced Endless recommendation is Minigunner, Void, Titan, Gumball and Sugar Rush. It covers opening damage, multi-target attacks, splash and lava damage, income and buffs.
Adjust an attack slot to solve the current problem:
- Ice: add cone slows when enemies need more time inside your damage coverage.
- Nebula: send enemies backward along the road to extend their exposure to attackers.
- Moon: add long-range damage for a 900-Cash placement.
- Dragoness: add recurring helpers for a 1,000-Cash placement.
Keep concentrated damage available for enemies that regenerate shields; defeat them before the next shield forms. Use the Endless team and progression strategy for development, relics and improvements between runs.
For a Legendary-only Bug Army team, equip Sun, Bomb, Moon, Dragoness and Assassin. Assassin covers the opening. Choose Treasure Map when offered for 25% more Cash from kills, then spend it on Moon and Dragoness. One run with this lineup completed 104 waves without Shiny dragons, Talent upgrades or a dedicated income dragon.
Co-op defense and economy
Agree on opening roles before the preparation countdown ends. In a two-player Nightmare setup, one player opens with Void Speed II while the other establishes two Gumballs. Both players then turn their resources into stronger defense; the economy player must also add damage as funds arrive.
Hydra adds directional coverage, so align its rectangular attack area with the road. Later Void and Dragoness investment extends the team's damage and helper coverage. The Nightmare co-op guide gives each player's budget and the transition from income to defense.
Map Walkthroughs
- Castle Town Normal: Open with Assassin, build Gold income and develop Minigunner, then add Bomb and a second Minigunner for the 30-wave finish. This route clears at 100/100 castle health.
- Pirate Cove Hard: Build income and rear coverage for Pirate Captain and Pirate Queen. The progression-loadout clear finishes with 8/100 castle health; completing Hard unlocks Talents.
- Snowy Summit Insane: Develop the Void, Gumball, Titan, Assassin and Sugar Rush lineup, with coverage for enemies that pass the opening defense. A separate Assassin/Fire progression route clears at 100/100. Completing Insane unlocks Endless.
- Volcano Fortress Nightmare: Choose the Minigunner–Titan economy-and-buff team or the Void Berserker–Gold core, then follow the matching 60-wave deployment route.
- Endless progression: Develop a balanced team, choose replacements for budget or control, and match relics and permanent upgrades to the run's current bottleneck.